Why Proper AC Maintenance Could Save You Thousands
AC maintenance is one of the most important and most overlooked things a homeowner can do to protect their comfort and budget.
Here’s a quick overview of what it involves:
| AC maintenance task | Who does it | How often |
|---|---|---|
| Replace or clean air filters | Homeowner | Every 1-3 months |
| Clear debris around the outdoor unit | Homeowner | Monthly or seasonally |
| Clean condenser and evaporator coils | Homeowner or pro | Annually |
| Clear the condensate drain line | Homeowner | Annually |
| Check refrigerant levels | Licensed pro only | Annually |
| Inspect electrical connections | Licensed pro only | Annually |
| Schedule a full professional tune-up | Licensed pro | Once a year, ideally in early spring |
Regular maintenance can cut energy use by up to 15% and add 5-10 years to your system’s life. Skipping it leads to higher bills, more breakdowns, and voided warranties.
In Florida’s heat, a failing AC is not just uncomfortable. It is a real problem. The good news is that most of what keeps an AC running well is simple and affordable. A few basic steps done consistently make a huge difference.
I’m Dustin Caison, President of Southern Air Cooling & Heating and a State Certified Air Conditioning Contractor with over two decades of hands-on AC maintenance experience serving North Florida. In the steps below, I’ll walk you through exactly what you can do yourself and when it’s time to call in a pro.

Why Annual AC Maintenance is Essential for Your Home
Annual AC maintenance is not just a nice extra. It is basic protection for your comfort system, your energy bills, and your home’s indoor air quality.
A clean, tuned air conditioner does not have to work as hard as a dirty one. According to guidance from the Department of Energy, routine maintenance helps air conditioners run more efficiently and avoid the performance drop that happens when filters and coils get dirty. In practical terms, that can mean up to 15% lower energy use when your system is kept in good shape.

There is also the lifespan issue. Regular service can help a system last 5 to 10 years longer. That is a big deal when replacing a central AC is one of the larger home expenses most families face. We cover this in more detail in regular AC maintenance and system lifespan.
Other reasons annual maintenance matters:
- Catches small issues before they become emergency repairs.
- Protects airflow, which is one of the biggest drivers of cooling performance.
- Helps support warranty requirements on some systems.
- Reduces dirt buildup on the evaporator coil and condenser coil.
- Helps prevent drain clogs that can lead to moisture problems and mold growth.
- Improves indoor comfort by controlling humidity more effectively.
In humid Florida conditions, neglected AC systems are especially prone to clogged drains, microbial growth, and overworked components. That is why we recommend scheduling professional maintenance before peak cooling season, then handling a few simple DIY tasks throughout the year.
7 Simple Steps for DIY AC Maintenance
Not every maintenance task requires a technician. There are several safe, homeowner-friendly steps that can make a real difference between professional visits.
Before you touch anything, remember the rule that saves fingers and frustration: turn off power first. Shut off the thermostat, use the breaker, and switch off the outdoor disconnect if you are working near the condenser. This matches the guidance commonly recommended by manufacturers such as Carrier.

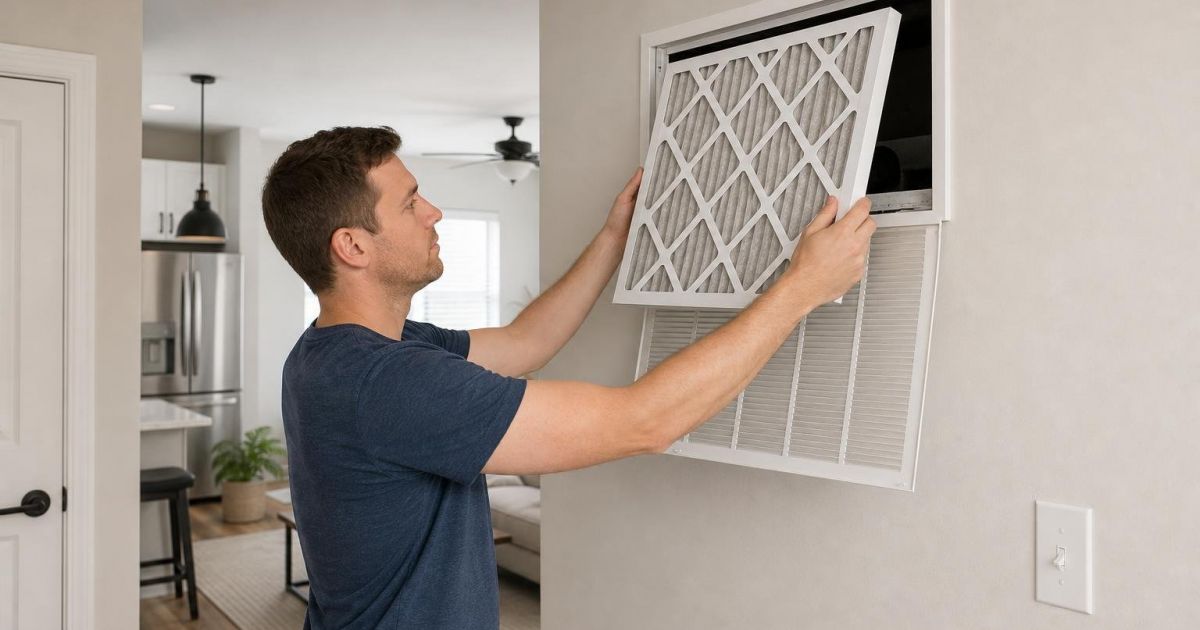
Step 1: Replace or Clean Air Filters
If you do only one thing consistently, do this.
Dirty filters restrict airflow, reduce efficiency, and can eventually allow dirt to build up on the evaporator coil. That makes the whole system work harder and can even contribute to frozen coils.
For most homes, check the filter every month and replace or clean it every 1 to 3 months. Homes with pets, heavy dust, allergy concerns, or near-constant AC use may need more frequent changes. Some wider 4-inch media filters can last much longer, but you should still inspect them regularly and follow manufacturer recommendations.
A few quick filter tips:
- Turn the system off before removing the filter.
- Match the airflow arrow on the filter to the direction of airflow.
- Do not assume a dirtier-looking filter means better filtration.
- Use the filter type your system is designed for.
- Be cautious with very restrictive filters if your system is not rated for them.
If you want more guidance on service timing, see how often to service your AC.
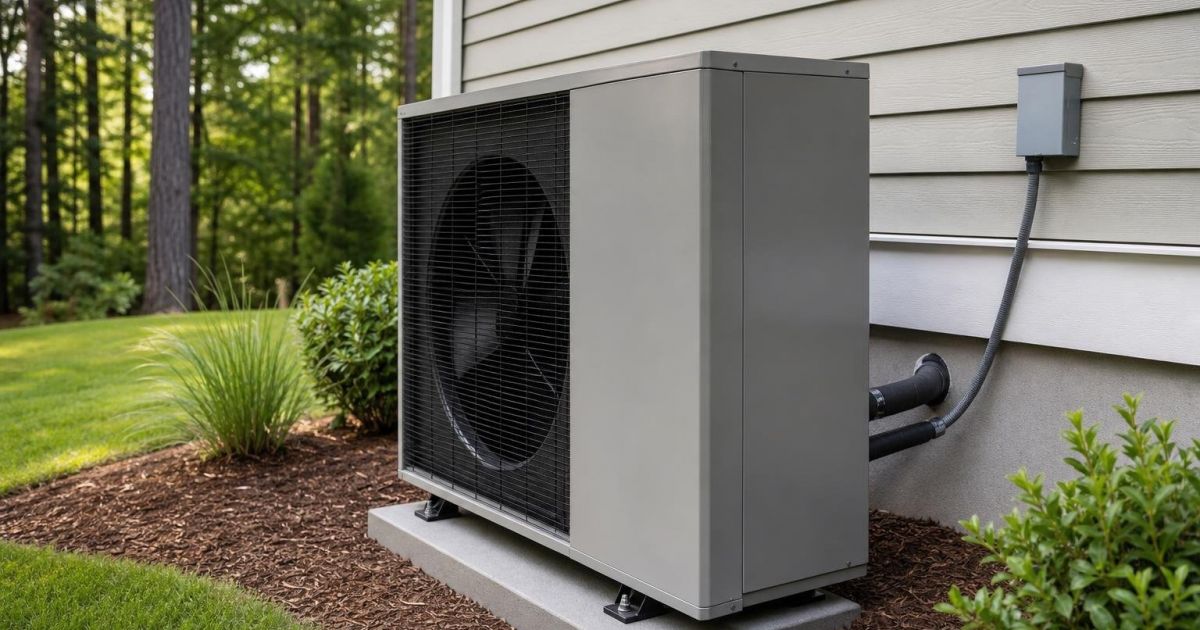
Step 2: Clean the Outdoor Condenser Unit
Your outdoor unit needs room to breathe. When leaves, grass clippings, mulch, and overgrown shrubs crowd the condenser, airflow drops and efficiency follows.
Start by clearing debris from around the unit. We recommend keeping at least 2 feet of open space on all sides. Trim back plants, remove branches, and clear away anything resting against the cabinet.
Then:
- Turn off power to the unit.
- Remove loose debris by hand or with a vacuum.
- Gently rinse the exterior fins with a garden hose from the inside out if accessible.
- Use a soft brush for stubborn dirt.
- Let everything dry before restoring power.
Important: never use a pressure washer. It can bend the delicate fins and create a much bigger problem than the dirt you started with.
Step 3: Straighten Bent Coil Fins
The thin metal fins on the condenser help move heat out of your home. If they are crushed or bent, airflow gets blocked.
Minor fin damage can sometimes be corrected carefully with a fin comb. In a pinch, some homeowners use a butter knife very gently, but slow and steady is the key. If a large section is badly damaged, leave it alone and call a pro.
Watch for these signs of fin trouble:
- Visible crushed spots on the coil.
- Reduced airflow through the outdoor unit.
- System running longer than usual.
- Higher utility bills without another clear reason.
This step is small, but it can improve heat transfer and system performance.
Step 4: Inspect the Indoor Evaporator Coil
The evaporator coil absorbs heat from indoor air. If it gets coated with dust, it cannot do that job well.
Access varies by system, so some homeowners may only be able to do a basic visual inspection. If you can safely reach the coil panel and open it according to manufacturer guidance, look for dust, grime, or signs of moisture issues.
Light cleaning may be possible with a no-rinse evaporator coil cleaner made for residential systems. Avoid harsh scrubbing, and never force anything into the coil.
Signs your evaporator coil may need attention:
- Weak airflow.
- Poor cooling.
- Ice on refrigerant lines or coil surfaces.
- Musty smells.
- Higher humidity indoors.
For a broader look at routine upkeep, visit regular AC maintenance.
Step 5: Clear the Condensate Drain Line
Your AC removes moisture from the air, and that water has to go somewhere. It travels through the condensate drain line. If that line clogs, you can end up with water leaks, mold issues, or a system shutdown.
Basic homeowner steps:
- Turn off the system.
- Locate the drain line access point.
- Check for standing water near the indoor unit.
- Use a wet/dry vacuum on the outdoor drain outlet to pull out clogs.
- If appropriate for your setup, use a stiff wire carefully to loosen debris near the opening.
If you notice repeated clogs, algae growth, water stains, or overflow at the air handler, it is time for professional attention. Drain issues are one of those problems that start small and turn expensive fast.
Step 6: Level the Unit and Check Seals
Outdoor condensers should sit level. If the pad shifts over time, the compressor can be placed under extra stress. That is bad news for one of the most expensive components in the whole system.
Take a quick look at the outdoor unit:
- Is it leaning noticeably?
- Has the soil washed away beneath the pad?
- Is one corner sinking?
A slightly uneven unit may be corrected with rot-resistant shims, but major settling should be handled professionally.
This is also a good time to check seals around refrigerant lines and, if you have a room AC, window seals. Gaps let hot, humid air sneak in and cooled air escape. Foam insulation and proper sealing can help efficiency and comfort.
Step 7: Monitor System Performance
Good AC maintenance is not just cleaning. It is also paying attention.
Sometimes the earliest warning signs are subtle:
- The thermostat says 72, but the house feels 78.
- One room feels like a refrigerator while another feels like a garage.
- The system runs constantly.
- It starts and stops too often.
- The electric bill climbs for no obvious reason.
- You hear buzzing, rattling, grinding, or hissing.
- You smell musty or burning odors.
These symptoms often point to airflow problems, thermostat issues, drain trouble, refrigerant problems, or electrical wear.
If your system starts acting strange, do not wait until it quits on the hottest day of the year, because that is exactly the sort of dramatic timing AC systems seem to enjoy. If you need help in our service area, start here: HVAC services in Fleming Island.
When to Call a Professional for AC Maintenance
DIY maintenance is helpful, but it does not replace a real tune-up. Some tasks require training, electrical safety knowledge, and EPA-compliant refrigerant handling.
That is especially true for:
- Refrigerant level checks.
- Leak testing.
- Electrical inspections.
- Voltage and amperage testing.
- Capacitor and contactor testing.
- Deep coil cleaning when access is limited.
- Blower motor inspection.
- Thermostat calibration.
- Airflow measurement.
A professional visit usually takes 1 to 2 hours and helps identify wear before it becomes a breakdown. For a full breakdown of what that service looks like, see professional AC maintenance services.
Professional AC Maintenance Checklist
A thorough professional tune-up usually includes most or all of the following:
- Replace or inspect the air filter.
- Clean condenser and evaporator coils.
- Inspect and clear the condensate drain.
- Check refrigerant charge and test for leaks.
- Tighten electrical connections.
- Measure voltage and amperage.
- Inspect contactors, capacitors, and terminals.
- Lubricate moving parts where applicable.
- Inspect blower components and blower motor.
- Verify thermostat accuracy and system controls.
- Check temperature split and overall cooling performance.
- Inspect for airflow restrictions and visible duct issues.
You can compare this list with our annual AC maintenance checklist.
Signs You Need Expert AC Maintenance Immediately
Some problems should move you from “I will keep an eye on it” to “I need to call now.”
Call a licensed HVAC technician right away if you notice:
- Ice on the evaporator coil or refrigerant lines.
- Frequent short cycling.
- Warm air coming from vents.
- Weak or almost nonexistent airflow.
- Water leaking around the indoor unit.
- Burning smells or signs of electrical overheating.
- Loud banging, screeching, or grinding sounds.
- A hissing sound that could indicate a refrigerant leak.
- Sudden spikes in your energy bill.
- The breaker trips when the AC starts.
Do not try to troubleshoot refrigerant leaks or electrical faults on your own. Those are professional-only jobs.
Frequently Asked Questions about AC Maintenance
How much does professional AC maintenance cost?
Professional AC maintenance typically costs about $65 to $200 per visit, though some markets and service plans can push pricing higher. Most tune-ups take 1 to 2 hours, depending on the system’s condition and accessibility.
Here is a simple comparison:
| Maintenance option | Typical cost | Time required | Best for |
|---|---|---|---|
| DIY basics | Low cost for filters and supplies | 15 minutes to 2 hours | Routine upkeep between tune-ups |
| Professional tune-up | $65-$200 per visit | 1-2 hours | Annual inspection, cleaning, and testing |
| Repair visit after a breakdown | Varies widely, often much higher | Depends on the issue | Fixing a problem after failure |
The cheapest route is usually consistent maintenance. Emergency repairs tend to cost more than prevention, especially during peak summer demand.
How often should I clean my AC filters?
For most homes, inspect the filter monthly and clean or replace it every 1 to 3 months. In homes with pets, dust, allergies, or heavy AC use, you may need to do it more often. Some systems with media filters may go longer, but they still need regular checks.
A good rule of thumb:
- Standard 1-inch filters: every 1 to 3 months.
- Heavy-use homes or pet owners: often monthly checks.
- 4-inch media filters: possibly up to 6 to 12 months, depending on system and manufacturer guidance.
How do I prepare my AC for the off-season?
In our Florida service area, many systems run enough year-round that “storage” is not always the right idea. But if your AC will be idle for a while, or you want to protect it during the cooler season, a few best practices help:
- Turn off power before cleaning or covering.
- Remove leaves, sticks, and dirt from around the outdoor unit.
- Do not wrap the whole unit in plastic or a non-breathable tarp.
- If recommended by the manufacturer, use a breathable cover or cover only the top to keep out falling debris.
- Remove any cover before operating the system again.
- Check the filter, thermostat, and drain line before the next cooling season.
- Schedule spring maintenance before heavy use starts.
One important exception: if you have a heat pump, do not cover the outdoor unit in a way that interferes with winter operation. Follow manufacturer guidance.
Conclusion
Good AC maintenance does not have to be complicated. Replace filters on time, keep the outdoor unit clear, watch for warning signs, and schedule a professional tune-up once a year. Those simple habits can improve efficiency, reduce surprise repairs, and help your system last longer.
At Southern Air Cooling & Heating, we have spent more than 43 years helping homeowners stay comfortable with reliable HVAC care across Palatka and surrounding communities. If you want expert maintenance, priority scheduling through our Comfort Club, and straightforward service from a family-owned team, we are here to help.
Learn more or schedule service here: air conditioning maintenance
Request Service
Please fill out the form below to request an estimate or schedule service.
"*" indicates required fields