What You Need to Know About Mini Split Installation Before You Start
Mini split installation is one of the most effective ways to add reliable heating and cooling to your Florida home, especially if you don’t have existing ductwork.
Here’s a quick overview of the core steps:
- Choose the right size unit for your space (BTUs based on square footage)
- Mount the indoor unit high on the wall with proper clearances
- Drill a small wall opening (2.5 to 3.5 inches) angled slightly downward
- Install the outdoor condenser on a level pad with adequate airflow clearance
- Connect the refrigerant lines, electrical wiring, and condensate drain
- Vacuum the line set to remove air and moisture (standard units)
- Release refrigerant and test the system
The average cost to install a ductless mini split ranges from $2,000 to $12,000, depending on system size, number of zones, and whether you hire a professional. A single-zone DIY install typically takes 4 to 8 hours.
Because heating and cooling account for roughly 52% of home energy use, getting the installation right matters. A poor install can cut system efficiency by up to 30%, costing you more every month on your energy bill.
There are real decisions to make here: pre-charged DIY kits, partial DIY with professional commissioning, or a full professional install. Each approach has trade-offs in cost, complexity, and risk. This guide walks you through all of them so you can choose the right path for your home.
I’m Dustin Caison, President and CEO of Southern Air Cooling & Heating, a State Certified Air Conditioning Contractor with over two decades of hands-on experience in mini split installation and HVAC service across North Florida. I’ll give you the honest, practical breakdown of what works and what to watch out for.
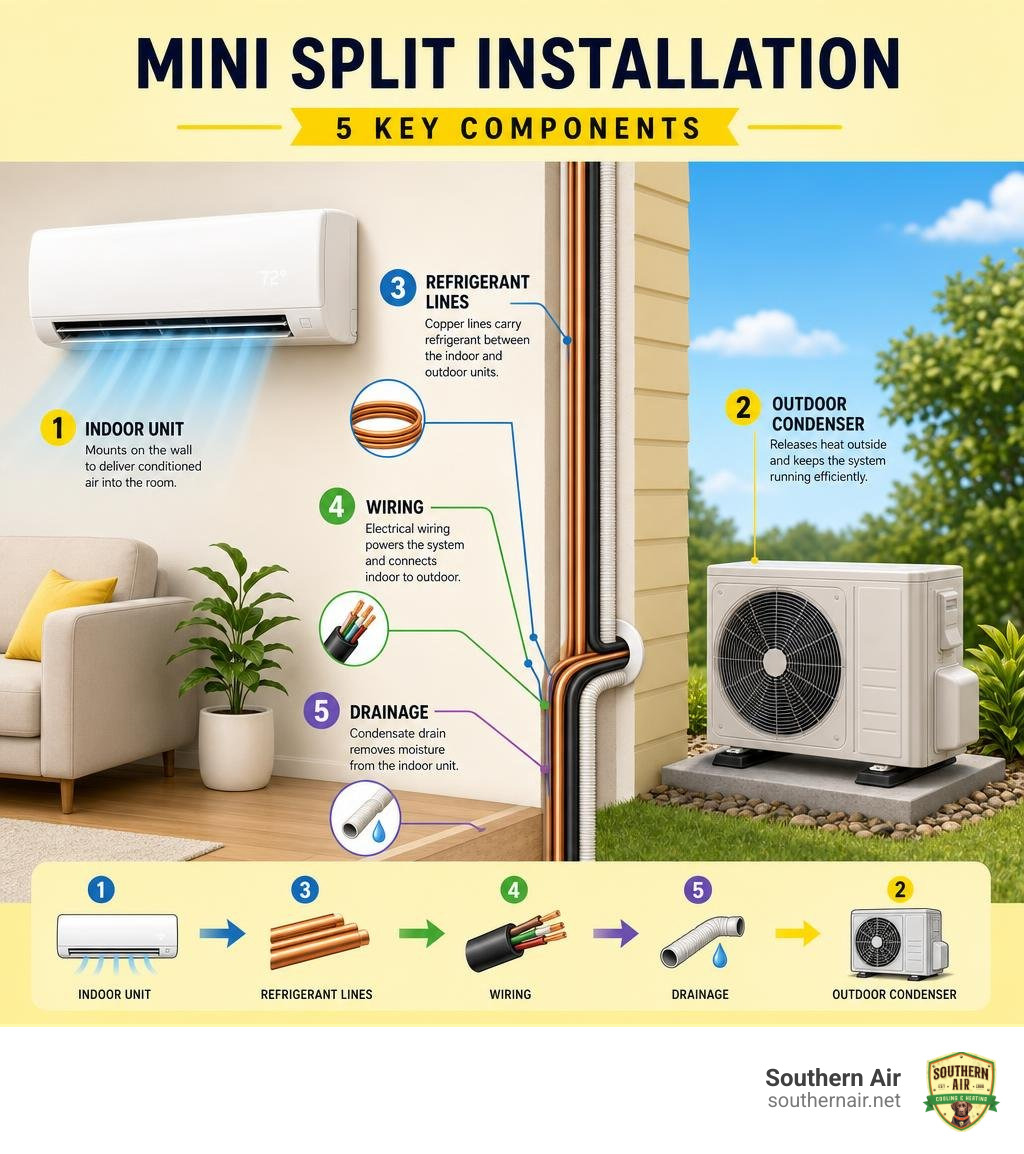
What is a Ductless System and How Does It Work?
To understand why the setup process is so precise, it helps to understand what is a ductless mini split HVAC system and how it differs from the traditional systems most of us grew up with.
Traditional central HVAC systems rely on a network of metal ductwork to push conditioned air throughout your home. While effective, ducts are notorious energy wasters. The U.S. Department of Energy reports that typical duct systems lose up to 30% of their cooling energy through leaks, seams, and uninsulated spaces like attics or crawlspaces.
Ductless mini splits bypass this issue entirely. By learning how do ductless mini splits work, you will see that they deliver conditioned air directly into individual rooms, or zones, without any ductwork at all.
An indoor air handler is mounted directly inside the living space. This unit is connected to an outdoor compressor by a small bundle of lines containing refrigerant piping, a power cable, and a condensate drain hose. Because there are no ducts to leak, mini splits are incredibly energy efficient.
Beyond energy savings, ductless systems can dramatically improve indoor air quality. Traditional ductwork can trap dust, pollen, pet dander, and mold, circulating them back into your living spaces. In fact, indoor air is often 2 to 5 times more polluted than outdoor air. Because mini splits feature individual, washable filters in each indoor unit, they catch particles right at the source, preventing them from spreading from room to room.
| Feature | Ductless Mini Split System | Traditional Central HVAC |
|---|---|---|
| Ductwork Required | No | Yes |
| Energy Efficiency Loss | Minimal (no duct loss) | Up to 30% loss through duct leaks |
| Temperature Control | Individual zone control | Single thermostat for whole house |
| Average Installation Time | 4 to 8 hours (single-zone) | 1 to 3 days (if adding ductwork) |
| Indoor Air Quality | High (localized, multi-stage filtration) | Moderate (dust can accumulate in ducts) |
Essential Steps for a Successful Mini Split Installation
No matter which installation approach you choose, the core physical steps of mounting and connecting the equipment remain the same. Every project must follow the guidelines laid out in the manufacturer installation manual to ensure the system operates safely and maintains its warranty.

Preparing for Your DIY Mini Split Installation
If you plan to tackle this project yourself, preparation is key. Rushing into the job without the proper tools is a recipe for a leaky, inefficient system. Unlike hanging a television or installing a ceiling fan, a standard mini split installation requires specialized HVAC tools to handle the refrigerant lines properly.
Before you begin, make sure you have the following tools on hand:
- Cordless drill and hole saw (2.5 to 3.5 inches) for making the wall pass-through.
- Torque wrench with open-ended adapters to tighten flare connections to precise manufacturer specifications (usually 18 to 36 foot-pounds).
- Vacuum pump and micron gauge set to evacuate air and moisture from the lines.
- Flaring tool if you need to cut and customize your copper refrigerant lines.
- Digital electrical tester to verify voltage and ensure safety.
- Safety gear including protective gloves and safety glasses.
For a complete breakdown of the preparation process, refer to a comprehensive diy mini split installation guide to ensure you do not miss any critical pre-install checks.
Positioning Units for Optimal Performance
Where you place your indoor and outdoor units directly affects how well they cool your home and how long they last.
For the indoor air handler, choose a location high on an exterior wall. It needs at least 6 inches of clearance from the ceiling and 5 inches from the sides to allow proper return airflow. It should also be mounted at least 6 feet off the floor.
When drilling the wall pass-through hole, always drill at a slight downward angle toward the outside. The outdoor end of the hole should be about 0.2 to 0.275 inches lower than the indoor side. This slope is critical because mini splits rely on gravity to drain the condensation collected from your indoor air. If the hole is level or slopes upward, water will back up and leak down your interior wall.
For the outdoor condenser, select a flat, level surface. You can mount it on a concrete ground pad or secure it to your home’s exterior wall using heavy-duty brackets. Ensure the outdoor unit has at least 12 inches of open clearance in the front and back, and at least 6 inches on the sides to allow the fan to exhaust heat efficiently.
5 Methods for Success: Tailoring Your Installation Approach
There is no single right way to install a mini split. The best method depends on your budget, your comfort level with electrical and plumbing work, and whether you are installing a single unit or a complex multi-zone system.
Before purchasing equipment, it is wise to research where can you install a ductless mini split to determine the best locations for your indoor heads.
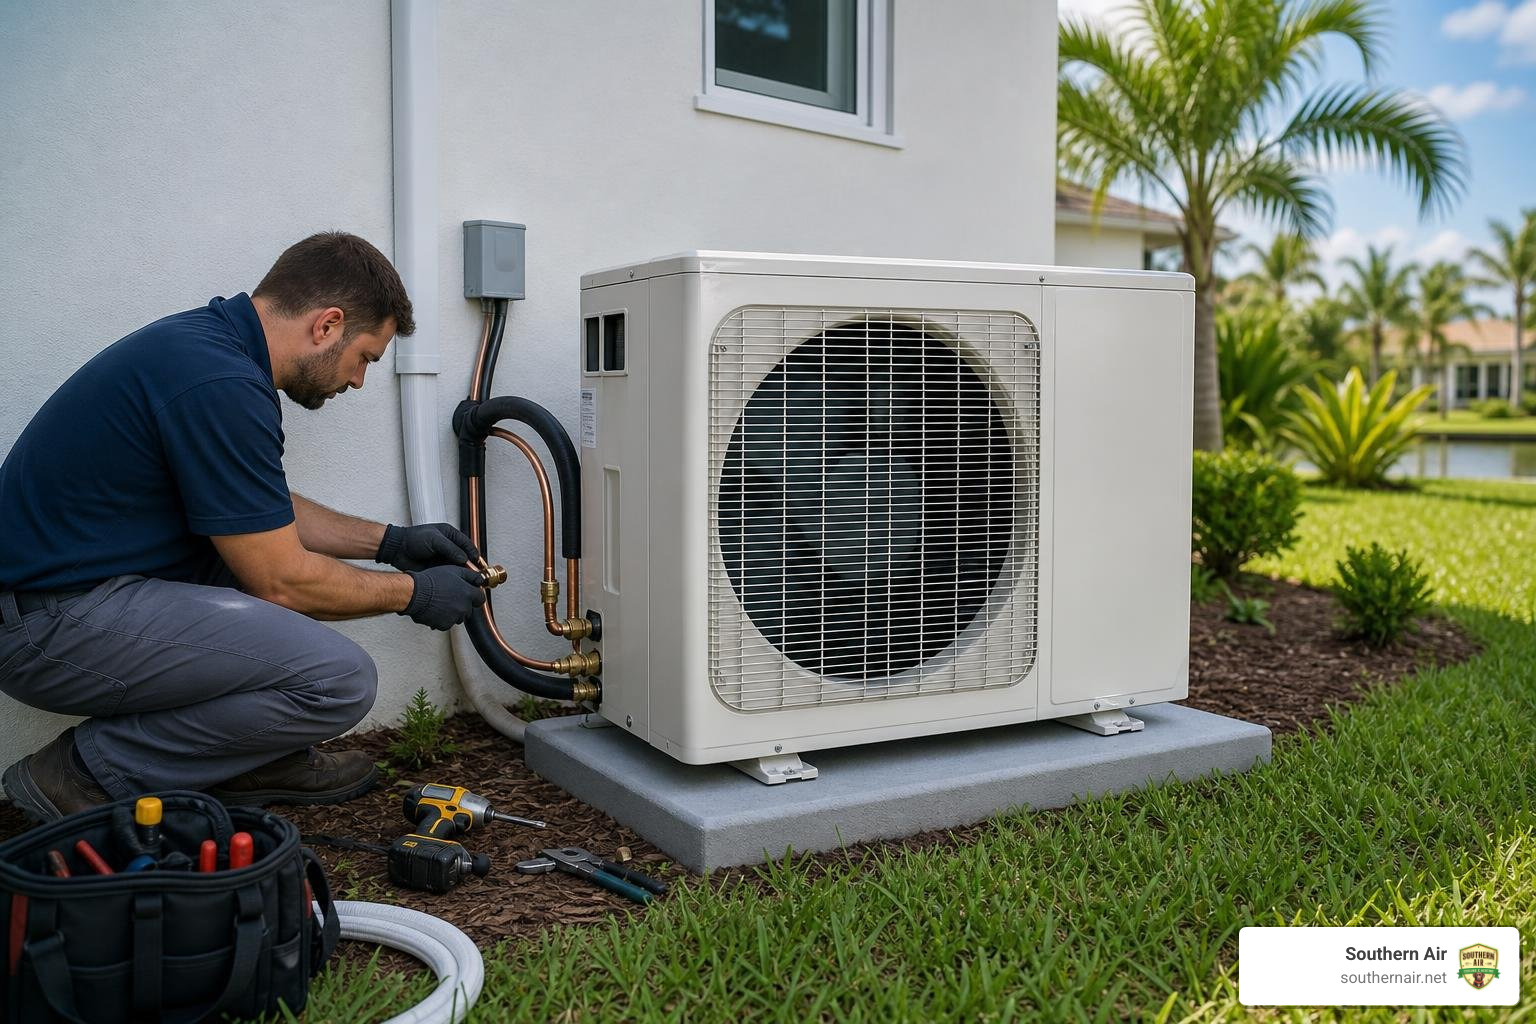
Method 1: The Quick-Connect Pre-Charged Route
For the true do-it-yourselfer, the quick-connect pre-charged system is the most accessible path. These specialized systems come with refrigerant lines that are already vacuumed and filled with the correct amount of refrigerant at the factory.
Because the lines are sealed, you do not need a vacuum pump, manifold gauges, or EPA certification to install them. You simply mount the units, run the lines, and thread the quick-connect fittings together using two open-ended wrenches. Once the connections are tight, you open the service valves to release the refrigerant into the system.
While this is the easiest DIY method, it has limitations. The line sets come in fixed lengths, typically 16 or 25 feet. Any excess line cannot be cut, so you must carefully coil the extra tubing horizontally behind the outdoor condenser without kinking the copper.
Method 2: The Standard DIY with Professional Commissioning
If you want a cleaner look without coiled copper lines outside your home, you can opt for a standard mini split system but use a hybrid installation approach. This method allows you to save money on labor while ensuring the highly technical steps are completed perfectly.
With this approach, you handle all the physical labor:
- Mount the indoor bracket and air handler.
- Drill the wall pass-through.
- Set the outdoor pad and condenser.
- Run the copper line set, drain hose, and control wiring through the wall.
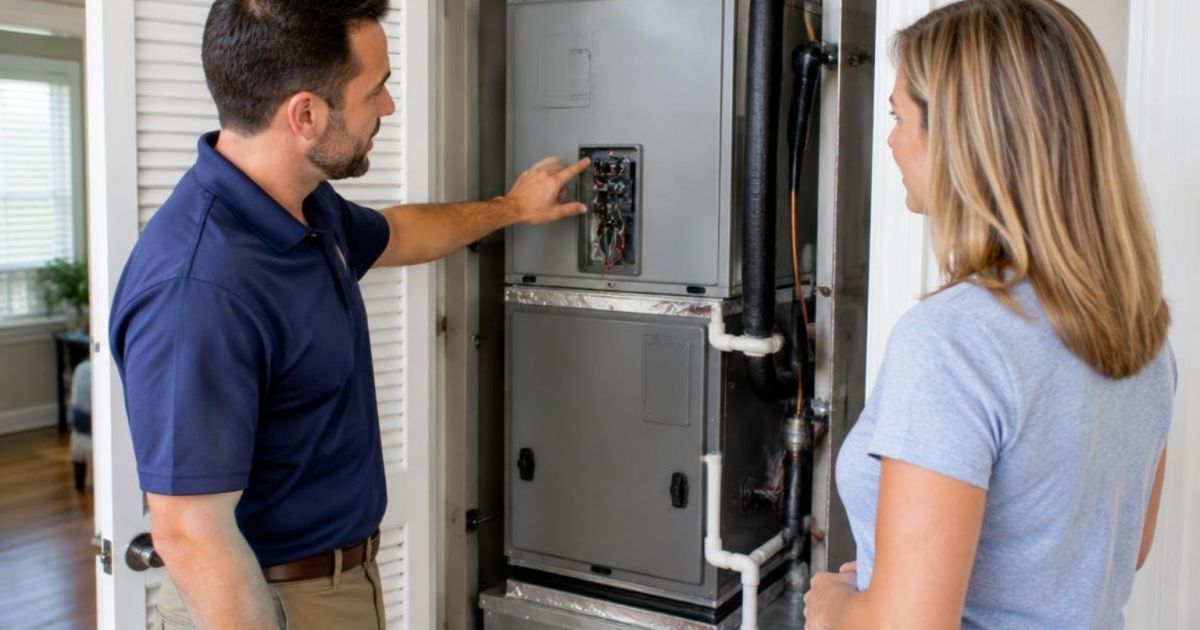
Once the physical installation is complete, you stop and call in a licensed HVAC technician to finish the job. The technician will cut the copper lines to the perfect length, flare the connections, perform a nitrogen pressure test to check for leaks, run a vacuum pump to remove moisture, and release the refrigerant. This method gives you the best of both worlds: significant cost savings and professional peace of mind.
Method 3: The Full Professional Mini Split Installation
For many homeowners, the safest and most reliable option is to leave the entire process to the professionals. A professional installation ensures that every step, from load calculations to final electrical hookups, complies with local Florida building codes.
When you hire a pro, they will perform a Manual J load calculation to ensure the system is sized perfectly for your room’s square footage, insulation level, and sun exposure. They will also handle the high-voltage electrical connections, which often require running a new, dedicated 220V circuit from your main breaker panel to an outdoor electrical disconnect box.
Most importantly, professional installation protects your investment. Many manufacturers will void their equipment warranty if the system is not installed and commissioned by a licensed HVAC contractor. If you are considering this route, check out our guide to hiring a mini split pro to help you find the right contractor for your project.
Method 4: Multi-Zone System Configuration
If you want to heat and cool multiple rooms in your home, you will need a multi-zone configuration. This setup connects multiple indoor air handlers to a single, larger outdoor condenser.
Multi-zone installations are significantly more complex than single-zone setups. They require running separate line sets and control wires from each indoor unit back to the outdoor compressor or a central branch box.
Each indoor unit operates on its own thermostat, allowing you to customize the temperature in different areas of your home. For example, you can turn off the cooling in an unused guest bedroom while keeping your living room perfectly chilled. This precise zone control maximizes your energy savings.
Method 5: Alternative Mounting (Ceiling and Floor)
While high-wall mounted units are the most common, they are not your only choice. If you have limited wall space, historic plaster walls, or simply do not like the look of a unit hanging on your wall, alternative mounting options are available.
- Ceiling Cassettes: These units are installed flush with your ceiling, fitting between standard ceiling joists. They are incredibly discreet, with only a flat grille visible, and they distribute air in four directions for exceptionally even cooling.
- Floor Consoles: These units mount low on the wall, near the floor, similar to a traditional radiator. They are ideal for attics with sloped ceilings, sunrooms with wall-to-wall windows, or for homeowners who prefer a unit that is easier to access for filter cleaning.
Frequently Asked Questions About Ductless AC
How much does it cost to install a mini split AC system?
The total cost to install a mini split varies widely based on the system’s capacity, the number of zones, and whether you choose professional or DIY installation.
A single-zone DIY installation using a pre-charged quick-connect system typically costs between $1,500 and $3,500 for the equipment and basic materials. If you need to hire an electrician to run a dedicated circuit, expect to add another $300 to $600.
For a professional installation, the average cost ranges from $4,000 to $12,000. While this upfront cost is higher, it includes professional sizing, code-compliant electrical work, permit fees, and a full labor warranty. To get a better idea of how these prices break down, read our detailed guide on how much does it cost to install a mini split AC system.
Can I install a mini split system entirely by myself?
Yes, you can install a quick-connect system yourself, but you must be honest about your skill level.
While the refrigeration side of a quick-connect system is DIY-friendly, the electrical and structural requirements are still demanding. You must be comfortable drilling a large hole through your home’s exterior wall, locating wall studs to securely mount a heavy indoor unit, and working with high-voltage electricity.
Additionally, you must comply with local Florida building codes. In many jurisdictions in North Florida, including Putnam and St. Johns counties, electrical work and HVAC installations require building permits and inspections. Performing this work without a permit can lead to fines and can cause issues when you try to sell your home in the future.
What are the most common installation mistakes to avoid?
Over our decades of servicing North Florida homes, we have seen many DIY installations go wrong. The most common mistakes include:
- Kinking the Copper Lines: Copper refrigerant tubing is soft and easy to bend, but it kinks easily if bent too sharply. A kinked line restricts the flow of refrigerant, which can starve the compressor and destroy the system. Always use a bending tool or bend the lines slowly over a wide radius.
- Improper Drainage Slope: If the condensate drain hose does not slope continuously downward, water will back up and overflow the indoor unit’s drain pan, damaging your drywall.
- Inadequate Clearance: Installing the indoor unit too close to the ceiling or placing the outdoor unit in a tight, unventilated breezeway restricts airflow, forcing the system to work harder and dramatically shortening its lifespan.
Conclusion
Whether you choose to tackle a quick-connect DIY project or opt for a hybrid approach, proper installation is the single most important factor in how well your new mini split will perform. Taking your time, using the correct tools, and following the manufacturer’s specifications will ensure your home stays cool and comfortable through the hot Florida summers.
If you decide that handling high-voltage wiring, drilling through exterior walls, and managing refrigerant lines is more than you want to take on, we are here to help. Southern Air Cooling & Heating has provided reliable, high-quality HVAC services in Palatka, FL, and surrounding areas for over 43 years.
As a family-owned business, we pride ourselves on delivering 5-star service to our neighbors in Crescent City, East Palatka, Elkton, Florahome, Fleming Island, Georgetown, Green Cove Springs, Hawthorne, Interlachen, Keystone Heights, Pomona Park, Saint Augustine, San Mateo, Satsuma, and Welaka. We offer priority Comfort Club maintenance plans to keep your system running at peak efficiency, and we feature great specials like $50 off repairs.
Ready to upgrade your home comfort? Contact us today to learn more about our professional ductless mini split services or to schedule your installation.
Request Service
Please fill out the form below to request an estimate or schedule service.
"*" indicates required fields